|
|
|
|
XPT ENGine tune-up
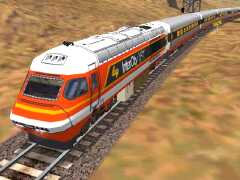
This year, 2002, is the 20th anniversary of the introduction of the XPT trainsets in Australia. Railway Digest March 2002 and April 2002 editions tell the story in more detail. As well, a visit to David Bromage's site at www.railpage.org.au/xpt/ is highly informative. Some readers may know that the XPT was derived from the British High Speed Train (officially classified as a Class 43) and it celebrates its 25th birthday in 2002. For Australian conditions, the Paxman Valenta engine was detuned, different bogies were fitted and new passenger cars designed and constructed. This page provides more prototypical performance for:
To make life easier, we'll alias the sounds and cab for the above, so you'll need:
To see how to alias, i.e., re-use the HST Class 43 cabview and sounds for each Class 43 and/or XPT trainsets, see Class 43 HST / XPT Cab & Sounds Aliasing. Install changesThese install steps are for Chris Jennings' latest version of his XPT in clxpt1b4.zip. If you've already installed it, you can skip the remainder of this paragraph, otherwise follow the readme and extract the files to the AUnswXPT folder. In WinZip's extract dialogue box, ensure that Use folder names is ticked and that the Extract to: textbox contains: C:\Program Files\Microsoft Games\Train Simulator\TRAINS\TRAINSET We're now going to make some changes so that we have consistency between folder names, ENGine file names, and .S and .SD file names to avoid MSTS being upset at any stage. This technique is recommended for any rolling stock installation, although not all developers follow it. See the ENG file section of ENG, CVF & SMS files for more information and browse the sample ENG file to see where this naming is implemented. So what we're going to do is to use three folders: xpt for one power car, xpthep for a power car supplying head-end-power for lighting and heating/cooling in the passenger coaches, and xptecon for the economy class passenger car. Start Explorer, click your way down to the Trainset folder and highlight the AUnswXPT folder. Now we'll get to work:
So before we forget, start WordPad and navigate to the xpthep folder so you can load xpteng.sd. You'll see this line: shape ( xpt.s Change the line so it reads: shape ( xpthep.s While here, save xpthep.sd and load xpthep.eng so we can make the following changes (you'll have to do some scrolling): Change this line: Wagon ( XPT so it reads: Wagon ( XPTHEP Change this line: WagonShape ( xpt.s ) so it reads: WagonShape ( xpthep.s ) Change this line (it's just past the Lights section): Engine ( XPT so it reads: Engine ( XPTHEP Change this line: Wagon ( XPT ) so it reads: Wagon ( XPTHEP ) Do a save but leave xpthep.eng open because there are the engine variables to change. You may as well open another copy of WordPad and load xpt.eng too. As a final check (because web•TrainSim can't remember!), open xptecon.sd in WordPad to make sure there's a reference to xptecon.s. As well, load xptecon.wag to make sure it's WagonShape line points to xptecon.s. ENGine valuesOn reading David Bromage's XPT specs page, web•TrainSim noted that he listed the traction horsepower available to a power car as well as the reduction in horsepower for the power car supplying head-on-power to the passenger cars. That's the reason for splitting up the original installation folder - after changing some engine values, we'll have two more realistically powered power cars. Here are the changes to make to both xpt.eng and xpthep.eng (except for wagon and engine names for the XPTHEP car which are listed further below). Note the cabview and sounds are now aliased - see Class 43 HST / XPT Cab & Sounds Aliasing on how to set up the cabview and sound files: Wagon ( XPT .............. WagonShape ( xpt.s ) .............. Mass ( 72t ) WheelRadius ( 20in ) .............. Adheasion ( 0.2 0.4 2 0 ) DerailRailHeight ( 4cm ) DerailRailForce ( 2.5*72t ) DerailBufferForce ( 500kN ) NumWheels ( 8 ) Friction ( 576N/m/s 0 1mph 12.42N/m/s 1.86 5.1N/rad/s 1 -1rad/s 0 1 ) AntiSlip ( 1 ) .............. MaxBrakeForce( 50kN#estimated ) .............. .............. Sound ( "..\\..\\Common.Snd\\Intercity125\\intercity125eng.sms" ) .............. Engine ( XPT .............. Wagon ( XPT ) Type ( Diesel ) MaxPower ( 1353kw ) MaxForce ( 84kN ) MaxContinuousForce ( 77kN ) MaxDieselLevel( 1000gal ) MaxVelocity ( 100mph ) MaxCurrent ( 1000A#est ) Sanding ( 15mph ) NumWheels ( 4 ) .............. CabView ( "..\\..\\Common.Cab\\Intercity125\\intercity125cab.cvf" ) MaxDieselLevel ( 1000gal ) DieselUsedPerHourAtMaxPower ( 30gal#est ) DieselUsedPerHourAtIdle ( 3gal#est ) .............. DieselEngineIdleRPM( 750 ) DieselEngineMaxRPM( 1750 ) DieselEngineSpeedOfMaxTractiveEffort( 60mph ) .............. EngineVariables ( 1000 ) Sound ( "..\\..\\Common.Snd\\Intercity125\\intercity125cab.sms" ) Name ( "XPT Powercar" ) .............. Here are the changes for xpthep.eng only: Wagon ( XPTHEP .............. WagonShape ( xpthep.s ) .............. Engine ( XPTHEP .............. Wagon ( XPTHEP ) .............. Name ( "XPT Powercar HEP" ) .............. You'll see that the sound and cabview aliases are listed in the above edits - we'll tell you below where they came from. There are some noticeable omissions, mainly because, as yet, web•TrainSim has yet to find specifications for more prototypical performance:
CabviewJames Hunt is responsbile for developing a BR-liveried Intercity 125 HST with a custom cabview. So you can alias his cabview to the XPT. You'll need brcl43.zip (4.5Mb, 24-Jan-02) from the Train-Sim.com file library. If you're searching the Train-sim.com file library, search for brcl43*.zip in case the filename is incorrect. Follow James' instructions in his readme to make his cabview available. In both xpt.eng and xpthep.eng, make the following edits (if you haven't already done so, as given in the ENGine section above): Use WordPad's CTRL-F to find: CabView ( acela.cvf ) and change it to read: CabView ( "..\\..\\Common.Cab\\Intercity125\\intercity125cab.cvf" ) To make sure this aliasing works properly, you'll have to check intercity125cab.cvf as each of its ACE graphics files needs to be referenced by a full folder name. So open hstcab.cvf in WordPad (you'll find the file in the Cabview sub-folder under the Intercity125 folder). Ensure each ACE is preceded by: ..\\..\\Common.Cab\\Intercity125\\ For example: CabViewFile ( "..\\..\\Common.Cab\\Intercity125\\hstcab640.ace" ) Don't forget the closing quote marks! SoundsThe default XPT ENGine file, xpt.eng uses the sounds of the default Dash 9 - for those who have heard an XPT, the Dash 9 sounds are completely inadequate! Bear in mind, too, that the XPT engines now have 4 low pressure turbochargers and 2 high pressure turbochargers - all those spinning rotors make lots of whine noise! So for some real sounds, you'll need cl43sfx.zip (4.2Mb, 14-Feb-02) from the Train-Sim.com file library. In both xpt.eng and xpthep.eng, make these changes: Change the following line: Sound ( "D9Eng.sms" ) to read: Sound ( "..\\..\\Common.Snd\\Intercity125\\intercity125eng.sms" ) And, change the following line: Sound ( "d9cab.sms" ) to read: Sound ( "..\\..\\Common.Snd\\Intercity125\\intercity125cab.sms" ) A final step is to use ConBuilder to edit the couple of consists that you loaded into the Consists folder as part of the original installation of the XPT. The two consists are named aunsw4xpt and aunsw6xpt. Delete all the rolling stock in each of these and build them again (to your own taste if you like), remembering that you need at least one XPT power car with HEP in each consist for prototypical performance. When web•TrainSim did a quick run on the Full Bucket Line with the re-tuned XPT set (the 6-car consist), performance seemed prototypical and top speed was a touch under 160kmh. Now go and have some fun... FootnotesIf you want to bring James Hunt's Intercity 125 to more prototypical performance, make the following changes:
MaxPower above is the rated figure for the BR Class 43 Intercity 125 power cars. The values for MaxForce and MaxContinuousForce were taken from a page comparing most of today's High Speed Trains. This site specifies the Class 43s to have 1320kw of power at the rail. You might notice that the Paxman engine revs a lot higher than other diesels, especially at idle (web•TrainSim has heard a couple standing at Spencer Street). The ARHS Railway Digest of April 2002 gives a good description of the XPT roster and how hard they work each week. On roster one, the Dubbo set travels just on 6,500 km/week. Roster two is for the Melbourne, Brisbane, Murwillumbah and Grafton services to/from Sydney. This is a complicated roster of seven separate trainsets, each covering just over 10,000 km/week. For those more interested in the specs of the Paxman VP185 diesel motor, see the links on David Bromage's XPT specs page or use these links: Valenta diesel engine specs and Valenta Paxman VP185 specs to read/download the Alstrom docs (PDF format). |
|
||||||||||||||||||||||||||||||||||||||||||||||||||||